The Importance of Keeping Your Home Dust-free
Maintaining a dust-free home is not just about aesthetics; it also has numerous health benefits. Dust is not just made up of dirt and debris; it also contains allergens, pet dander, and even microscopic organisms like dust mites. Breathing in these particles can trigger allergies, asthma, and other respiratory issues. Regular dusting is essential to create a healthy living environment for you and your family. One of the most effective tools for dusting is the humble feather duster. Its soft bristles are designed to attract and trap dust particles, making it an ideal tool for keeping your home clean and dust-free.
However, using a feather duster is not as simple as waving it around haphazardly. To achieve the best results, you need to understand how it works and employ the correct technique. In the following sections, we will delve into the details of using a feather duster effectively to tackle dust in every corner of your home.
Introducing the Feather Duster as a Cleaning Tool
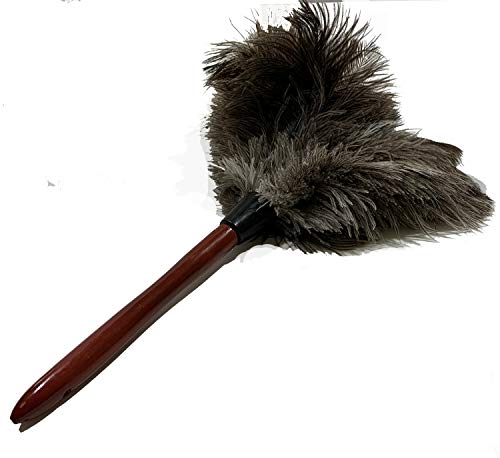
Feather Dusters

Feather dusters have been used for centuries to clean delicate surfaces and remove dust from hard-to-reach areas. Traditionally made from feathers, modern feather dusters are now often made from synthetic materials. The soft and fluffy bristles create an electrostatic charge that attracts and holds onto dust particles, preventing them from resettling elsewhere. Feather dusters are lightweight and easy to maneuver, making them ideal for dusting furniture, shelves, blinds, and other household surfaces.
When using a feather duster, it's important to choose one with high-quality bristles that won't shed or scratch delicate surfaces. Look for feather dusters made from ostrich feathers or synthetic materials that mimic their softness and effectiveness. Now that you have your feather duster ready, let's explore how it works and how you can make the most of its dusting capabilities.
Understanding How a Feather Duster Works
To effectively use a feather duster, it's helpful to understand how it works. The soft bristles of a feather duster create a static charge when they come into contact with surfaces. This static charge attracts dust particles, causing them to stick to the bristles rather than being dispersed into the air. As you move the feather duster across surfaces, the trapped dust particles remain attached to the bristles until you shake or tap the duster to release them. This unique mechanism allows you to effectively remove dust from various surfaces without simply spreading it around.
Feather dusters are particularly useful for dusting delicate items such as glassware, artwork, and electronics. The soft bristles can easily glide over these surfaces without causing any damage. Additionally, feather dusters are excellent for dusting intricate and hard-to-reach areas, such as decorative moldings, lampshades, and tight corners. Their lightweight design enables you to reach high places without straining your arm or using a ladder. Now that you have a better understanding of how a feather duster works, let's move on to choosing the right one for your needs.
Choosing the Right Feather Duster for Your Needs
When it comes to feather dusters, not all are created equal. There are various types and sizes available, each suited for different purposes. Choosing the right feather duster for your needs will ensure that you achieve the best results while cleaning. Here are some factors to consider when selecting a feather duster:
1. **Bristle Quality**: Look for a feather duster with high-quality bristles that won't shed or scratch surfaces. Ostrich feather dusters are known for their softness and durability, making them an excellent choice. If you prefer synthetic materials, opt for dusters with microfiber or electrostatic bristles that mimic the effectiveness of natural feathers.
2. **Size**: Feather dusters come in different sizes, ranging from small handheld versions to larger ones with extendable handles. Consider the size of your home and the areas you need to dust. Smaller dusters are great for quick touch-ups and cleaning smaller surfaces, while larger dusters are better for covering more ground and reaching high places.
3. **Handle Length**: If you have high ceilings or tall furniture, consider a feather duster with an extendable handle. This will allow you to reach high areas without straining yourself or using a step stool. Adjustable handles are also beneficial for reaching low areas without bending over.
4. **Cleaning and Maintenance**: Check if the feather duster is easy to clean and maintain. Some dusters can be hand-washed or machine-washed, while others require gentle shaking to remove trapped dust. Choose a feather duster that suits your cleaning preferences and lifestyle.
Now that you know what to look for in a feather duster, it's time to learn the proper technique for dusting with it.
Proper Technique for Dusting with a Feather Duster
Using a feather duster may seem intuitive, but employing the correct technique will maximize its effectiveness. Follow these steps to ensure you get the best results when using a feather duster to dust your home:
1. **Preparation**: Before you start dusting, ensure that the feather duster is clean and free from any trapped dust particles. If necessary, gently tap or shake the duster to remove any lingering debris. This will prevent cross-contamination and ensure that you're not spreading dust around instead of removing it.
2. **Top to Bottom**: Begin dusting from the top of the room and work your way down. Start with higher surfaces such as ceiling fans, light fixtures, and tall furniture. Gradually move down to shelves, tabletops, and finally, the floor. This method prevents dust from settling on already-cleaned surfaces.
3. **Gentle Touch**: When dusting, use a gentle touch and let the feather duster do the work. Avoid applying too much pressure, as this may cause the bristles to flatten and reduce their effectiveness. Simply glide the duster over the surfaces, allowing the bristles to attract and trap dust particles.
4. **Corners and Crevices**: Pay special attention to corners, crevices, and other hard-to-reach areas where dust tends to accumulate. Use the feather duster to reach into these spaces and gently remove any trapped dust. The soft bristles can easily fit into tight spots without causing damage.
5. **Shake or Tap**: As you dust, periodically tap or shake the feather duster to dislodge any trapped dust particles. Do this outside or over a trash can to prevent the dust from resettling on cleaned surfaces. If you're using a synthetic feather duster, follow the manufacturer's instructions for cleaning.
By following these simple steps, you'll be able to effectively use a feather duster to keep your home dust-free. However, it's important to note that there are specific areas in your home that require regular dusting. Let's explore those areas in the next section.
Areas in Your Home That Require Regular Dusting
To maintain a truly dust-free home, it's crucial to identify and address areas that are prone to dust accumulation. Here are some common areas in your home that require regular dusting:
1. **Furniture**: Dust tends to settle on furniture surfaces, especially on tabletops, shelves, and the tops of chairs and sofas. Use your feather duster to gently remove dust from these surfaces. Pay attention to the undersides and backs of furniture as well, as they can collect dust over time.
2. **Electronics**: Dust can wreak havoc on electronics, affecting their performance and longevity. Regularly dust your televisions, computers, speakers, and other electronic devices using a feather duster. Be careful not to apply excessive pressure or touch sensitive components.
3. **Blinds and Curtains**: Blinds and curtains are notorious for trapping dust. Use your feather duster to gently remove dust from the slats of blinds and the fabric of curtains. For fabric blinds and curtains, consider using a vacuum cleaner with a brush attachment for a more thorough clean.
4. **Light Fixtures**: Dust can accumulate on light fixtures and diminish their brightness. Turn off the power and use your feather duster to delicately remove dust from light bulbs, lampshades, and any crevices. If necessary, use a damp cloth to wipe down glass fixtures.
5. **Air Vents**: Dusty air vents can circulate allergens and impede airflow. Use your feather duster to remove dust from the vents and grilles. If the dust is stubborn, you may need to use a soft-bristled brush or vacuum attachment for a more thorough clean.
Remember, regular dusting is key to maintaining a dust-free home. By incorporating these areas into your cleaning routine, you'll be well on your way to a cleaner and healthier living space. But how can you maximize the efficiency of your feather duster? Let's find out in the next section.
Tips for Maximizing the Efficiency of Your Feather Duster
While a feather duster is an effective tool on its own, there are several tips and tricks you can employ to enhance its dusting capabilities. Here are some ways to maximize the efficiency of your feather duster:
1. **Avoid Overloading**: To ensure optimal dusting, avoid overloading your feather duster with too much dust. Shake or tap it regularly to release trapped particles. If the duster becomes too dusty, clean or replace it before continuing.
2. **Use in Conjunction with Other Tools**: While a feather duster is versatile, it may not be suitable for all surfaces or hard-to-reach areas. Consider using it in conjunction with other tools, such as microfiber cloths, soft brushes, or vacuum attachments, to achieve comprehensive cleaning.
3. **Dust Regularly**: Regular dusting prevents the accumulation of dust and makes your cleaning tasks easier. Set a dusting schedule that works for you, whether it's once a week or every other week. Consistency is key to maintaining a dust-free home.
4. **Store Properly**: After each use, store your feather duster in a clean and dry location. Avoid placing it in a dusty or humid area, as this can lead to mold or mildew growth. Protecting your feather duster will ensure its longevity and effectiveness.
5. **Replace When Necessary**: Over time, the bristles of a feather duster may become less effective at attracting and trapping dust. If your feather duster starts shedding excessively or fails to pick up dust, it's time for a replacement. A worn-out duster will not produce the desired results.
By implementing these tips, you'll be able to make the most of your feather duster and achieve a higher level of cleanliness in your home. However, there are some common mistakes that you should avoid to ensure effective dusting. Let's explore those in the next section.
Common Mistakes to Avoid When Using a Feather Duster
While using a feather duster may seem straightforward, there are some common mistakes that can hinder its effectiveness. To achieve the best results, avoid the following mistakes when using a feather duster:
1. **Pressing Too Hard**: Applying excessive pressure on the feather duster can flatten the bristles and reduce their dust-attracting abilities. Use a gentle touch and let the soft bristles do the work.
2. **Not Cleaning the Duster**: Neglecting to clean the feather duster regularly can lead to cross-contamination and the spread of dust instead of its removal. Shake or tap the duster outside or over a trash can to remove trapped dust particles.
3. **Using on Wet Surfaces**: Feather dusters are not designed for wet cleaning. Using a feather duster on wet surfaces can lead to clumping, damage to the bristles, and reduced effectiveness. Ensure surfaces are dry before dusting.
4. **Neglecting Hard-to-Reach Areas**: Feather dusters are excellent for reaching tight corners and crevices. Don't neglect these areas, as they tend to accumulate dust. Take the time to dust hard-to-reach spots for a thorough clean.
5. **Not Replacing Worn-out Dusters**: Over time, the bristles of a feather duster can wear out and lose their effectiveness. If your duster starts shedding excessively or fails to pick up dust, replace it with a new one for optimal dusting results.
By avoiding these common mistakes, you'll be able to use your feather duster effectively and achieve the best possible results. However, there may be some areas in your home that are challenging to dust even with a feather duster. Let's explore some additional tools and techniques for tackling these hard-to-reach areas.
Other Tools and Techniques for Dusting Hard-to-Reach Areas
While a feather duster is versatile and effective, there are instances where you may need additional tools and techniques to tackle hard-to-reach areas. Here are some alternatives to consider:
1. **Microfiber Cloths**: Microfiber cloths are excellent for dusting delicate surfaces and areas that require a more thorough clean. They can be used dry or slightly dampened to attract and trap dust effectively.
2. **Soft Brushes**: Soft-bristled brushes are ideal for dusting intricate surfaces, such as decorative moldings, lampshades, and keyboard keys. They can reach into small crevices and dislodge stubborn dust particles.
3. **Vacuum Attachments**: Many vacuum cleaners come with brush attachments specifically designed for dusting. These attachments can reach high places and provide powerful suction to remove dust effectively.
4. **Compressed Air**: For hard-to-reach areas with intricate details, compressed air cans are a handy tool. They blow a strong stream of air that dislodges dust from tight spots. Use caution and follow the manufacturer's instructions when using compressed air.
By incorporating these additional tools and techniques into